Sprout House
In this activity, you will
learn about germination and build your own “green” house.
Supplies Required
- 4 plain sponges
- Scissors
- Toothpicks
- Liquid glue
- Plate
- Seeds (wheat berries, chia, or alfalfa seeds sprout quickly)


The Challenge
Seeds contain the food and all the instructions to create a new plant. In order for the plant to grow, the seed needs the right temperature, the right amount of water, and the right amount of sunlight. At the very beginning, the seed depends on the energy stored within it to grow, but once it is planted, it uses water to start the growth process.
First, the roots break out of the hard protective outer layer of the seed called the seed coat. Roots help to anchor the plant and absorb water and nutrients. Next, the seed begins to grow a stem, a process called germination. Once germination takes place, the plant grows, eventually making its own food from nutrients it takes in from the soil and through photosynthesis.
Problem and Hypothesis
[contact-form-7 id="18628" title="STEM book form SCI 1"]Let’s Experiment and Build!
Instructions
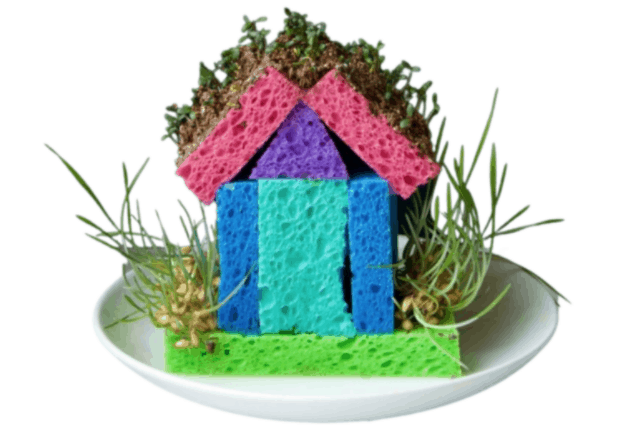
- Select a sponge to be the base of your house
- Cut a second sponge in half to form two walls
- To make the other walls, cut the third sponge in half
- For the roof, they cut the last sponge in half
- To hold up the walls, insert two toothpicks in the bottom and sides of each wall with about 1/2 inch of toothpick sticking out
- If your walls still seem a little wobbly, you can use a little hot glue to hold them together
- Use the same method to construct the roof
- Put about a tablespoon of seeds in a little dish and mix in a little water to make a seed slurry
- Spread the seed paste on the sponges
- Pour water onto the plate and lightly over the sponges – the water will soak up into the sponges and moisten the seeds
- Make sure you keep your sponges moist and wait for your seeds to sprout
- Eat your sprouts to grow big and strong!
Experiment, Analysis, and Conclusion
[contact-form-7 id="18626" title="STEM book form SCI 2"]Think about it and Additional Resources
Share on social media: Record a video or take a picture of your activity
and post the results online using the hashtags:
#SproutHouse
#ProjectExploration
#StemAtHome
Tag a friend and challenge them to do it, too!
For more activities like this one, go to www.projectexploration.org/stemhome. If you’re interested in learning more about Project Exploration and our free events, programs, and activities, please find us on social media and be sure to follow!
Call or text us for help: 312-772-6634
In these videos, you will learn…
- How a seed becomes a plant
- About the parts of a plant